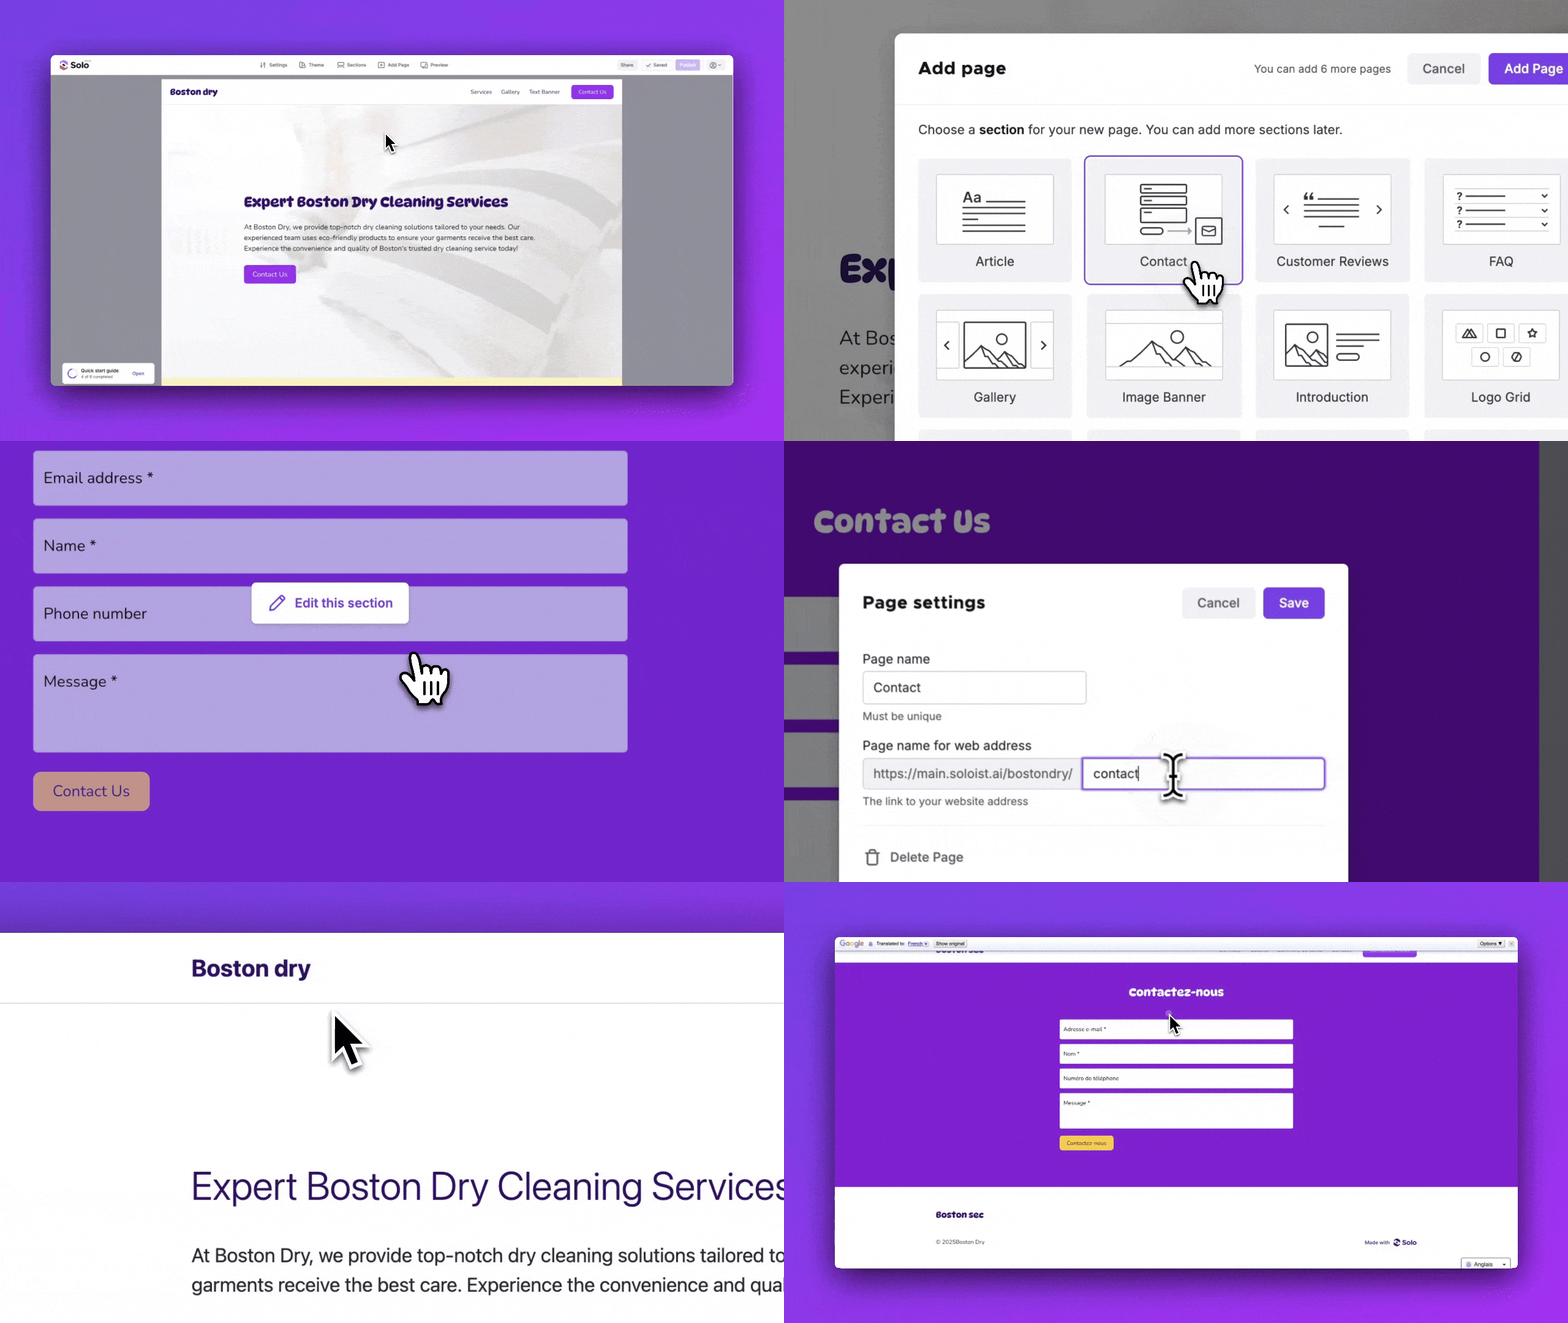
You can add 6 additional webpages to your Solo website. Each page can be customized with any number of sections.
To add a page to your Solo website:
- Visit the designer
- In the top toolbar, click [Add Page]
- In the Add page pop-up window, click a section type for your new page. You can add more sections to that page later.
- Type in your page name.
- Note this will be used for both: a) the address to that page and b) the link name added to your header
- Click [Add Page]
- You should now see the page toolbar with tabs for each of your pages.
- To modify the sections or content on that page, you can click on the page name on the page toolbar to navigate to that page
- To edit your page name or page address you can click the [Pencil icon] next to the page name in the page toolbar. From here, you can also delete your page.
- When completed, click [Publish] to see your new multi-page website

You can visit the new page from soloist.ai/YourWebsiteName/PageName or if you have a custom domain connected, from YourCustomDomain.com/PageName.
Note: Any options customized in Settings applies to all of your pages.
How to delete a page? #
- Visit the designer
2. In the page toolbar, click the pencil icon next to the page name
3. In the Page settings modal, you can change the Page name, Page name for web address field, or click [Delete Page] to delete that page
Note, Solo does not auto-save or provide undo functionality, so please copy your text or other changes elsewhere if you need them, before deleting your page.