Add Calendly to your website
Calendly makes a scheduling widget so customers can book appointments with you. To use this integration in Solo, you have two options:
A) Use the Scheduling Section
B) Use the Code Embed Section
To display your scheduling widget directly on your website, use the Embed Section and follow the steps below.
Step 1: Get your Calendly embed code
These steps happen on the Calendly website. See Calendly's embed documentation for the latest screenshots and walkthrough.
- Go to Calendly and sign in to your account.
- From your dashboard, click the Event Types tab.
- To embed all event types, click the dropdown arrow next to your account name. To embed a single event type, click the dropdown arrow next to that specific event.
- Click Share → Embed.
- Choose an embed style:
- Inline — the calendar appears directly on the page (recommended for most sites).
- Popup Widget — a floating button that opens a popup.
- Popup Text — a text link that opens a popup.
- Click Continue, then copy the provided embed code snippet.
Note: Calendly's UI may change over time. If the steps above don't match what you see, refer to Calendly's embed documentation for the most up-to-date walkthrough.
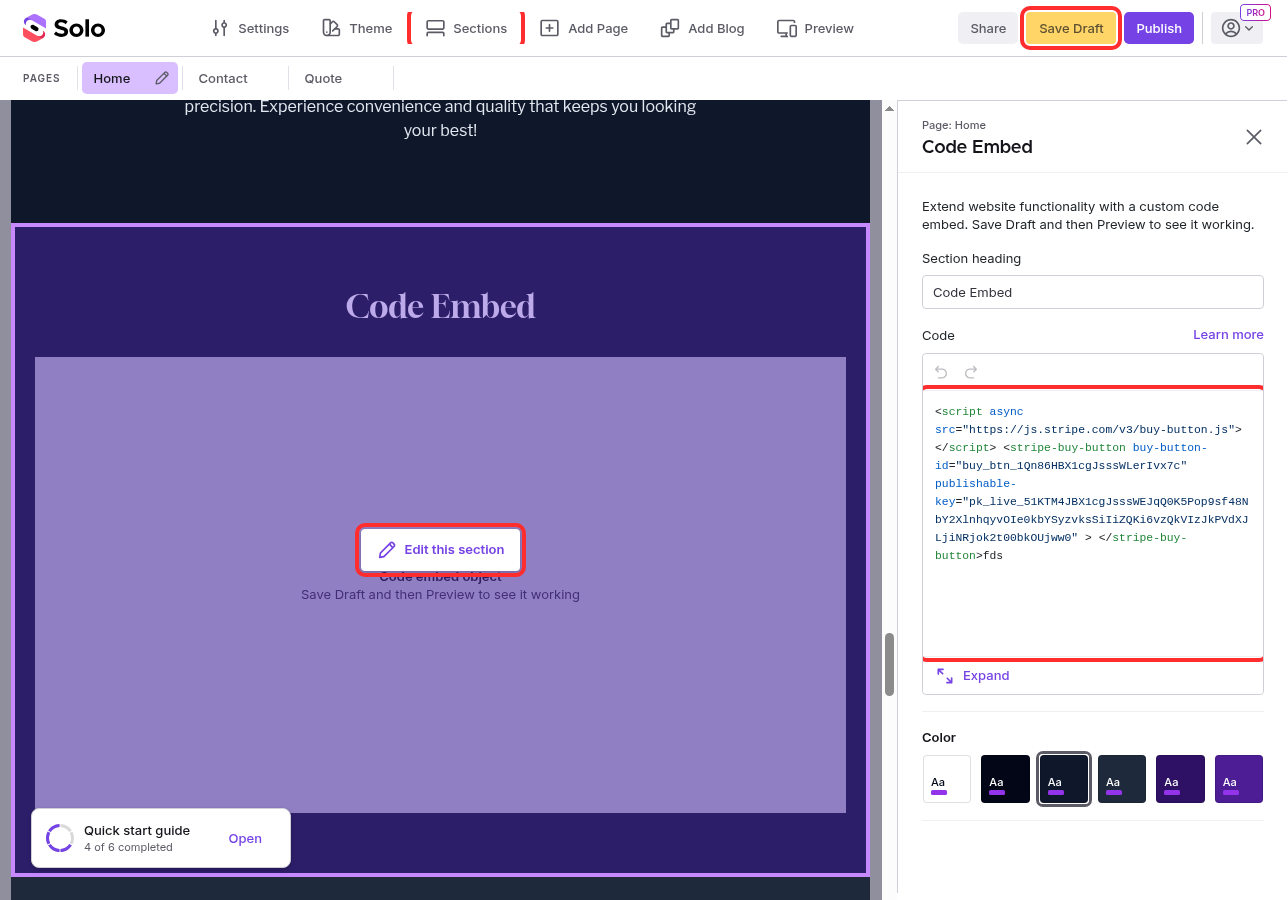
Step 2: Add the code to your Solo website
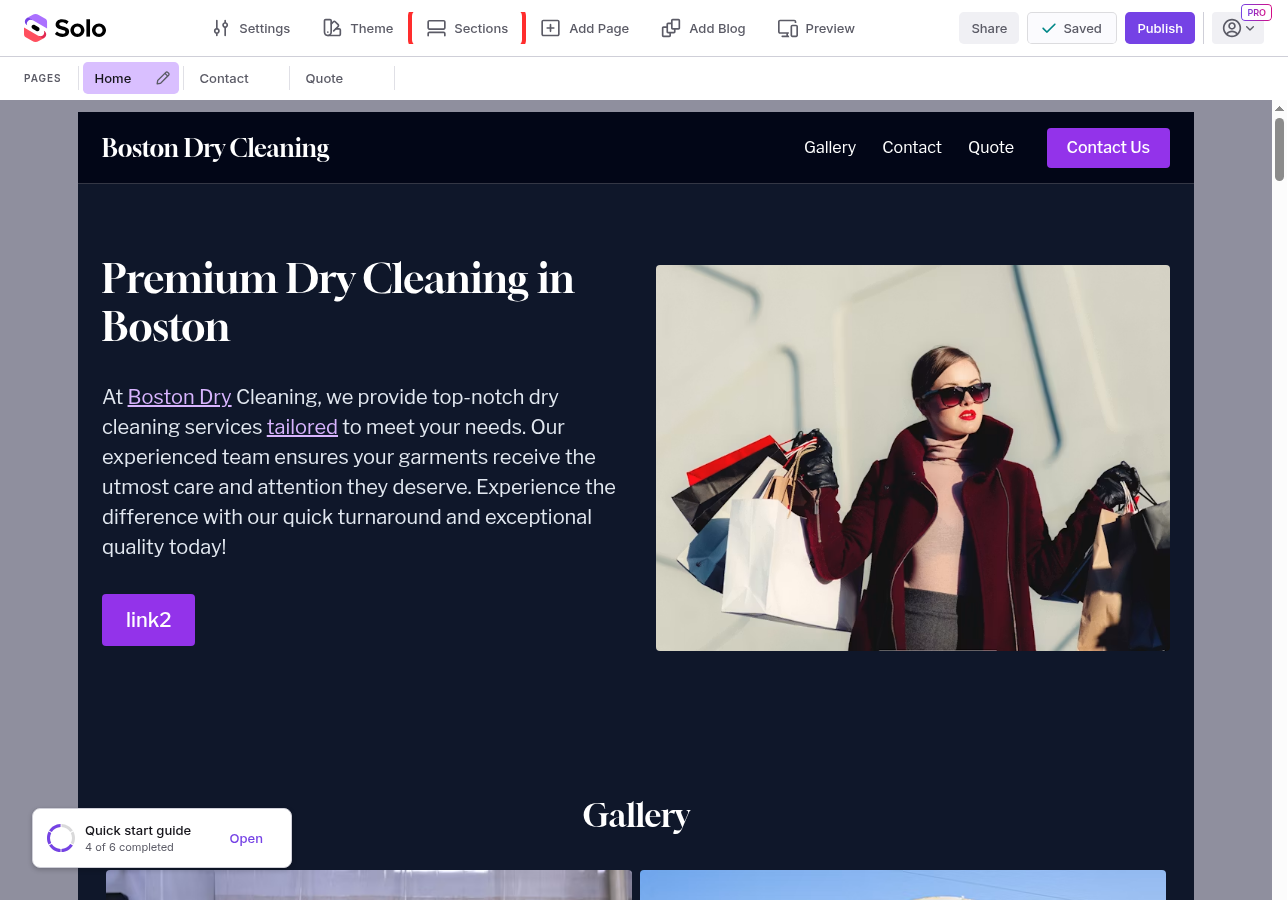
- Visit the designer

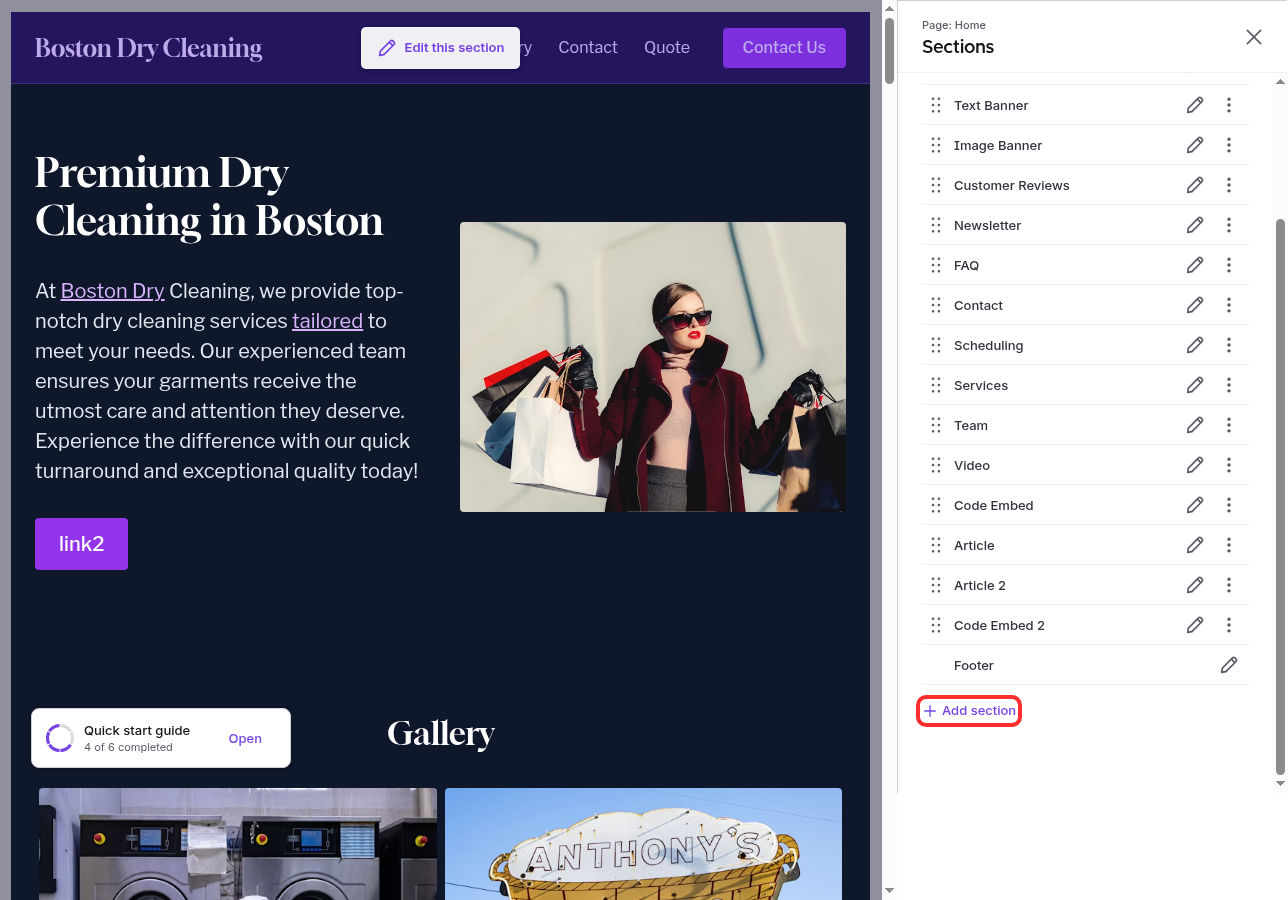
- In the top toolbar, click
Sections
- In the Sections right sidebar, click
Add section
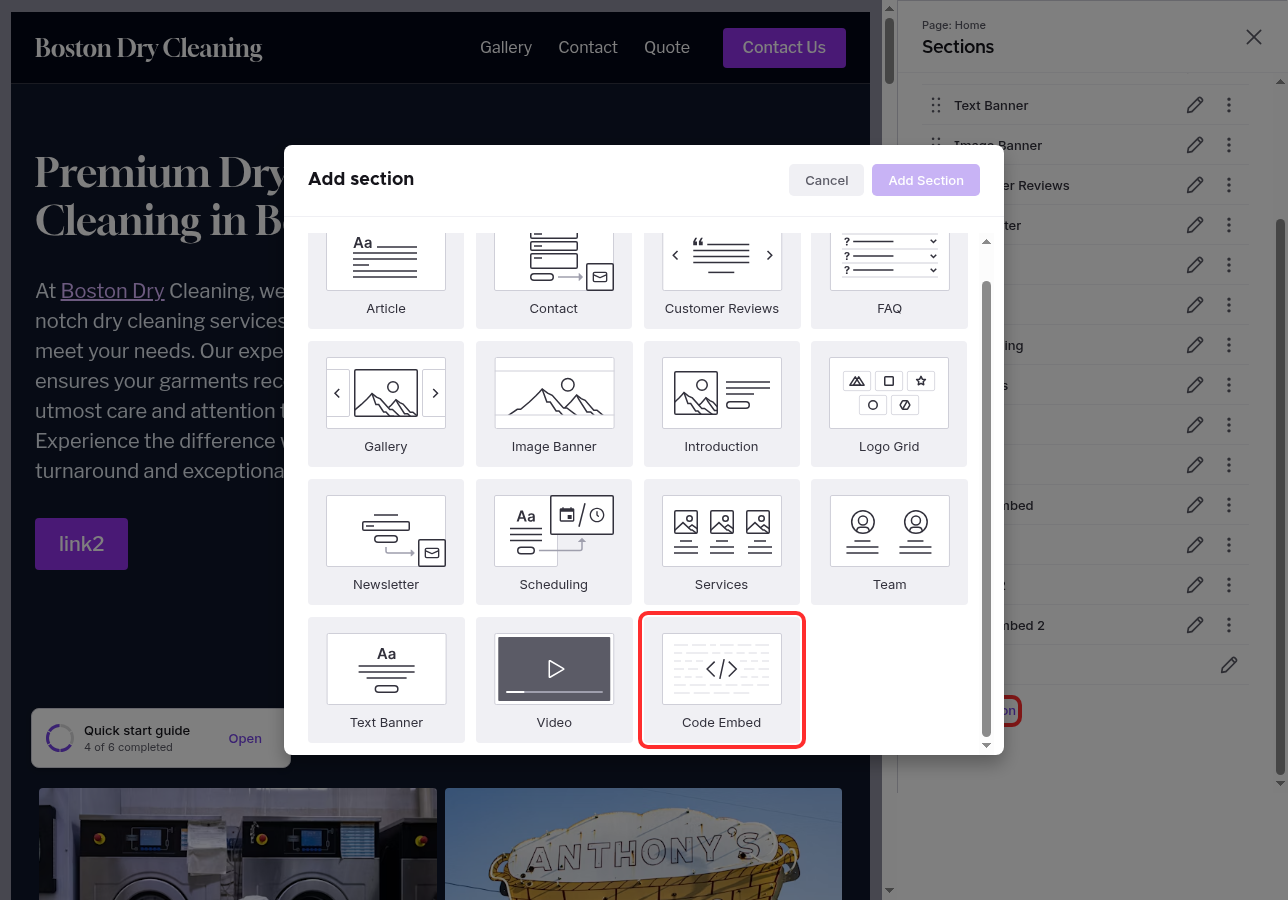
- Double click the
Code embedsection in the modal to add it to your website
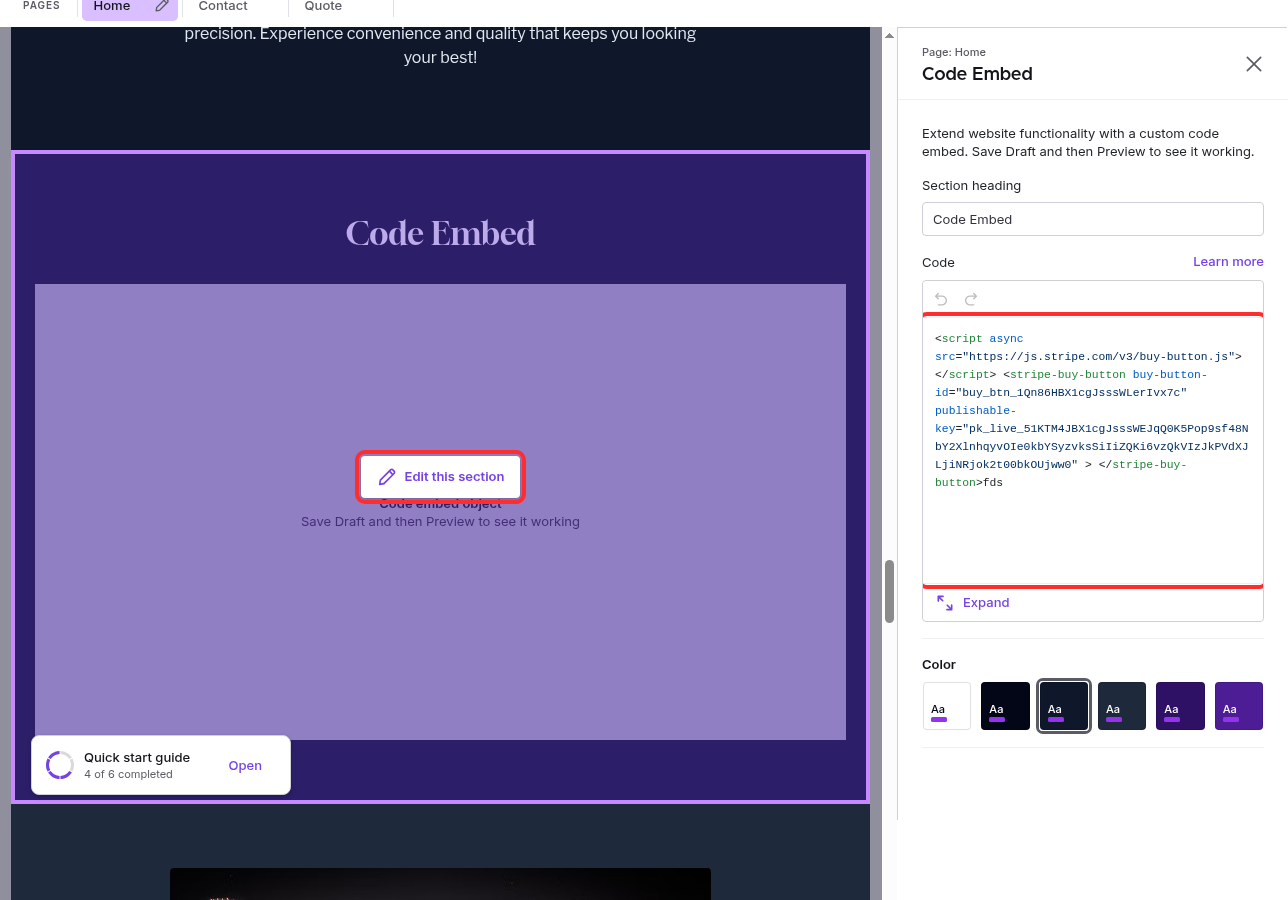
- In the designer area, scroll down to the Code embed, and hover over the section
- Click
Edit section

- In the Code embed right sidebar, paste the embed code you copied from Calendly.
- In the right top toolbar, click
Save Draft
- Try previewing your site before you click
Publishto make sure you're happy with the expected result.
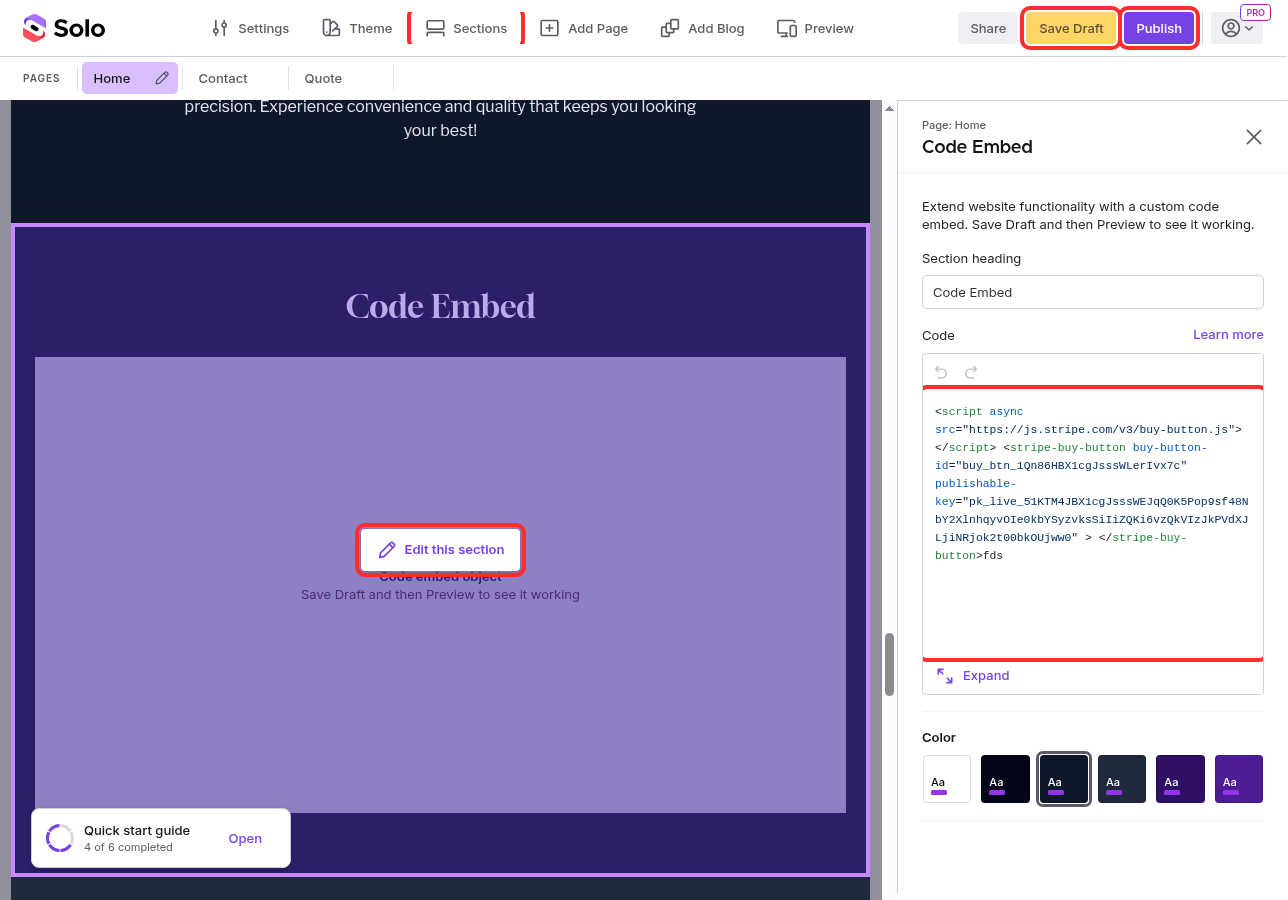
Once added, your Calendly scheduling widget will appear directly on your live website.
Related Articles
Still have a question? Post to our Reddit group or email the team.